
Download the worksheets below:
- Volcano maths worksheet - big numbers version
- Volcano maths worksheet - small numbers version
- Volcano maths worksheet - final blank version
How to Turn Any Kid’s Idea Into a Learning Activity
I try to keep the worksheets fun and not too repetitive, so when the kids make their own suggestions I do my best to bring their ideas to life. This keeps them engaged and makes learning feel like play rather than work.
Just the other day my son asked for a maths activity but not the multiplication table. Over time the kids have picked up on the fact that they can suggest something that pops into their heads and in one shape or form it does appear in their worksheets (just like magic, lol). So as my son finished making the request, he paused and then said:
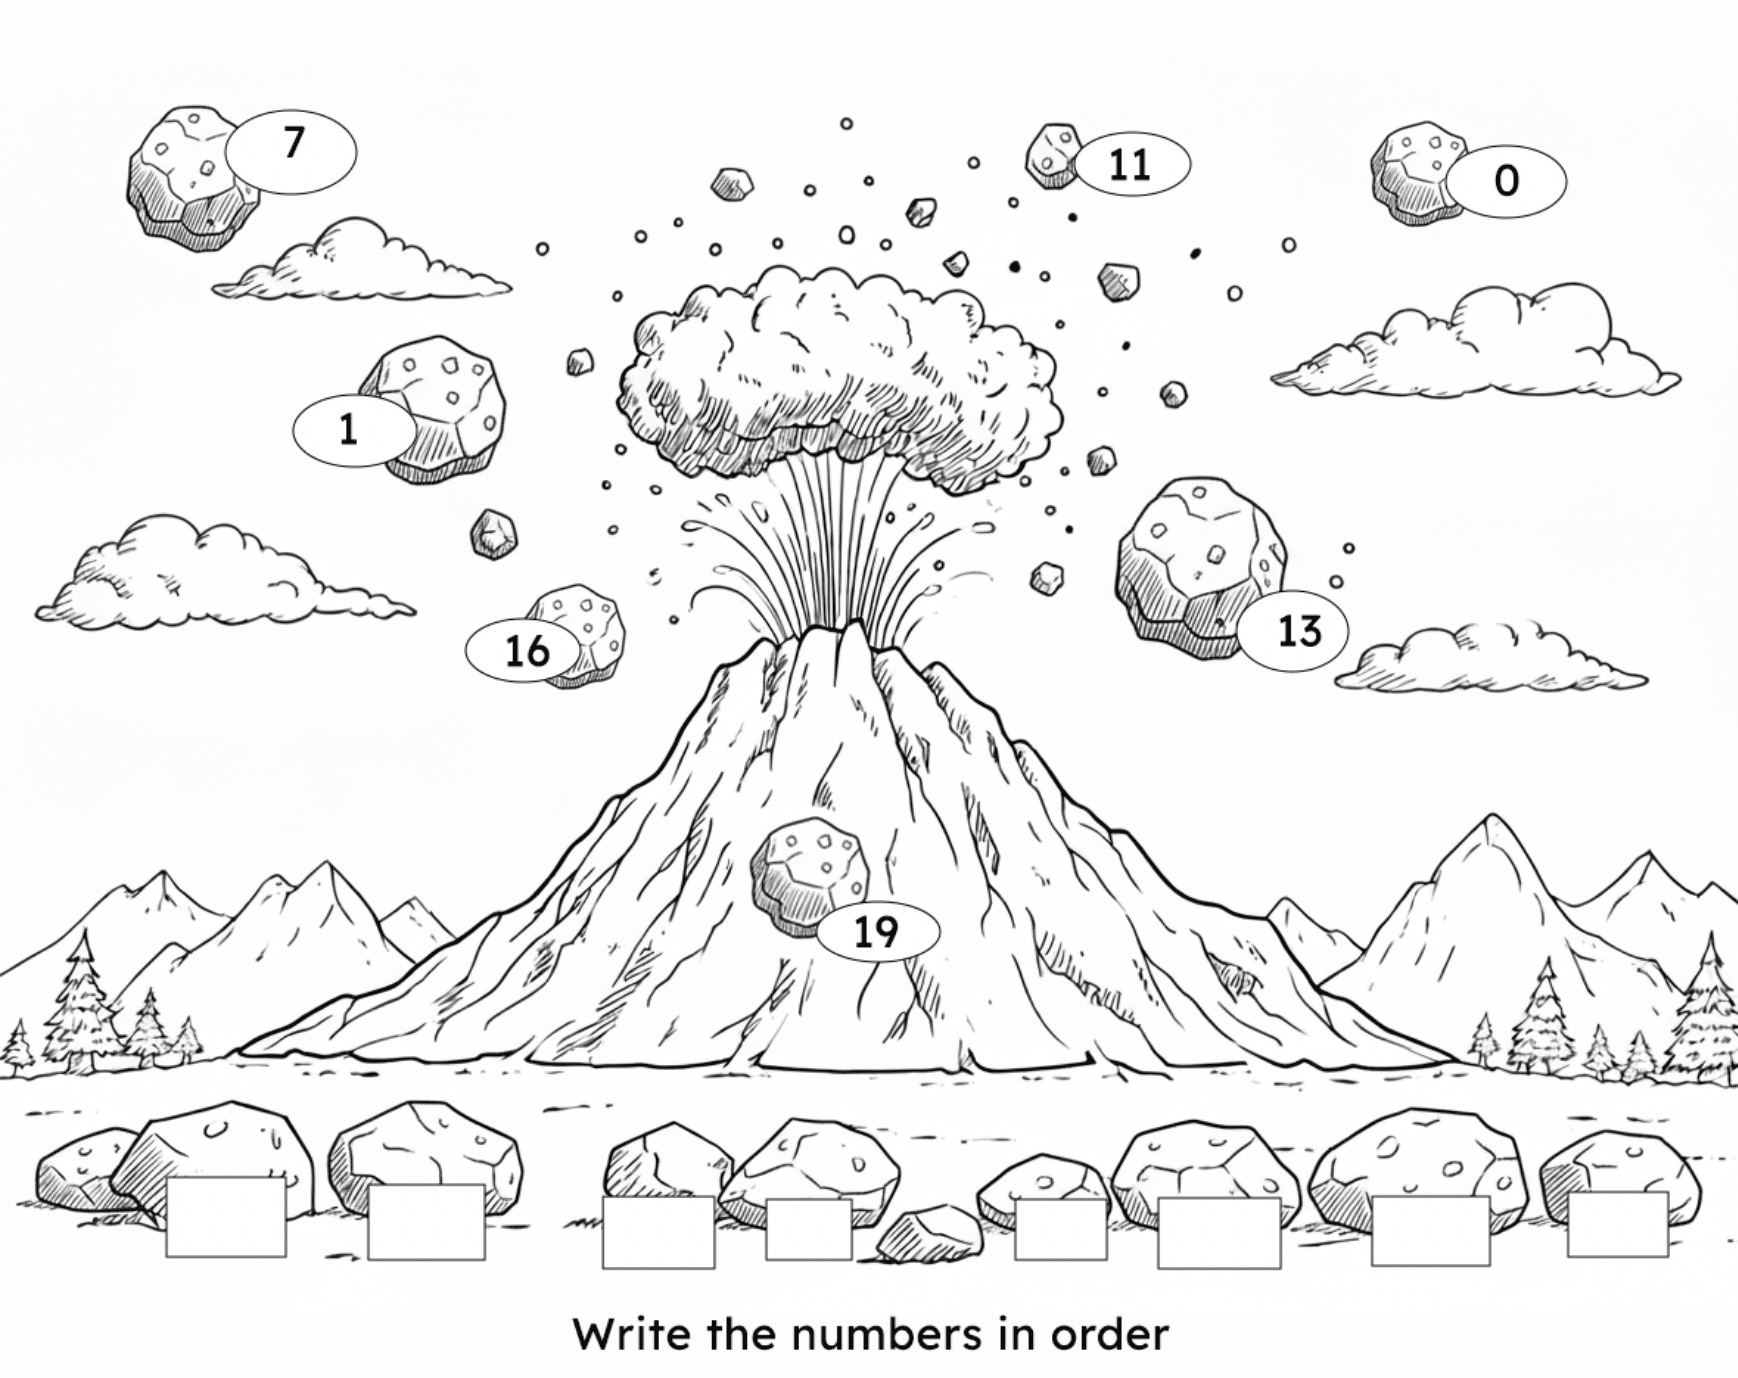
Can it be a volcano? Can it explode? And can there be numbers flying out of it?
And so on… It wasn’t quite a ready-made activity plan, but there was enough of an idea for me to work with. After some questioning it turned out they are working on ordering numbers up to a thousand at school, so that felt like a good fit. I could also easily adjust the numbers down to a 1-20 range for my daughter. Always nice when you can (just about) reuse an activity for both worksheets.
Key tip: Ask your child what they’re learning at school right now. This helps you match their creative idea to actual educational objectives.
Now that we had the learning concept, I needed to create the visual.
How to Find and Create Images (Even If You Can’t Draw)
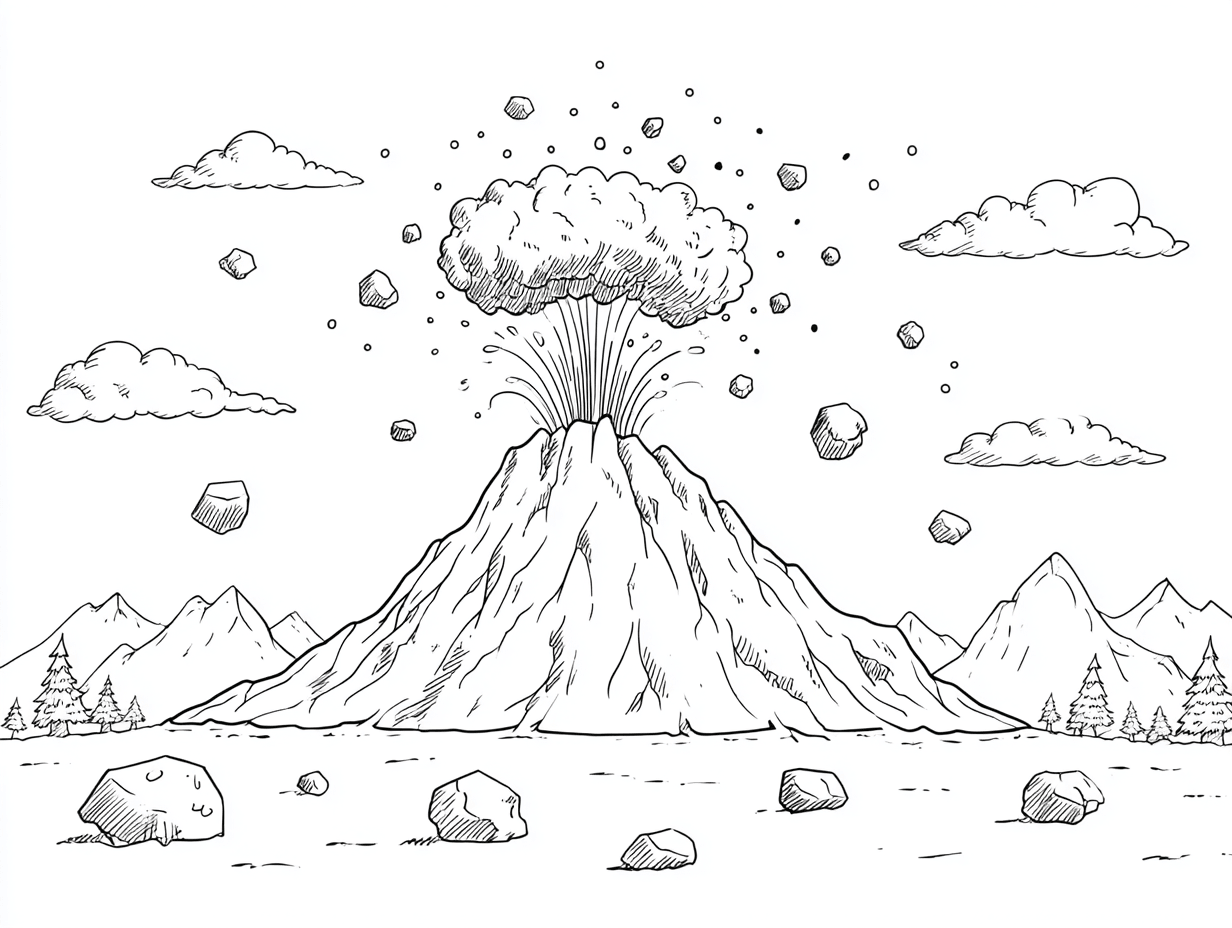
I started by making a quick sketch of the volcano and flying boulders.
There are many different free options to get this step done:
- scribble something on a piece of paper and take a photo
- use any drawing app, e.g. Paint, OneNote, whatever your phone/computer has on hand
- use any of the free online drawing tools, e.g. Sketchpad, AutoDraw, Adobe Express, etc.
Pro tip: Keep your sketch simple. You just need enough detail to communicate the concept. Too much detail is a distraction at this point.
Depending on how complex your picture is, you can free draw it or use basic shapes to get the idea across. Once the sketch is done we want to turn it into a proper drawing. Now if you’ve got the skills to do it great! If you’ve got a friend you can call in a pinch, amazing! But if you can’t draw to save your life, do not despair, we have options.
Free Images
First of all, if you’re going to just print it out for yourself and your kiddo at home - the world’s your oyster. Google for images, copy and you’re done. Even stock photo sites often have clean previews. As long as you are not sharing or selling these, you can be creative. But if you want to do more than that, or let’s say your child’s request is a bit out there while also being very specific, there are AI options available.
Important: Always check image licensing. For personal use, most images are fine, but if you plan to share your worksheets online, stick to truly free images or create your own.
AI Image Generation
This might not be everyone’s cup of tea. Also, unless you’re going for a purely colouring activity, there still is some image editing involved (like in the case of the volcano here).
Don’t worry if you’re not tech-savvy: The AI tools are designed to be user-friendly, and I’ll walk you through each step.
Choose your chatbot:
- Gemini (Google) - recommended for the excellent image editing capabilities
- Claude
- ChatGPT
- Copilot (Microsoft)
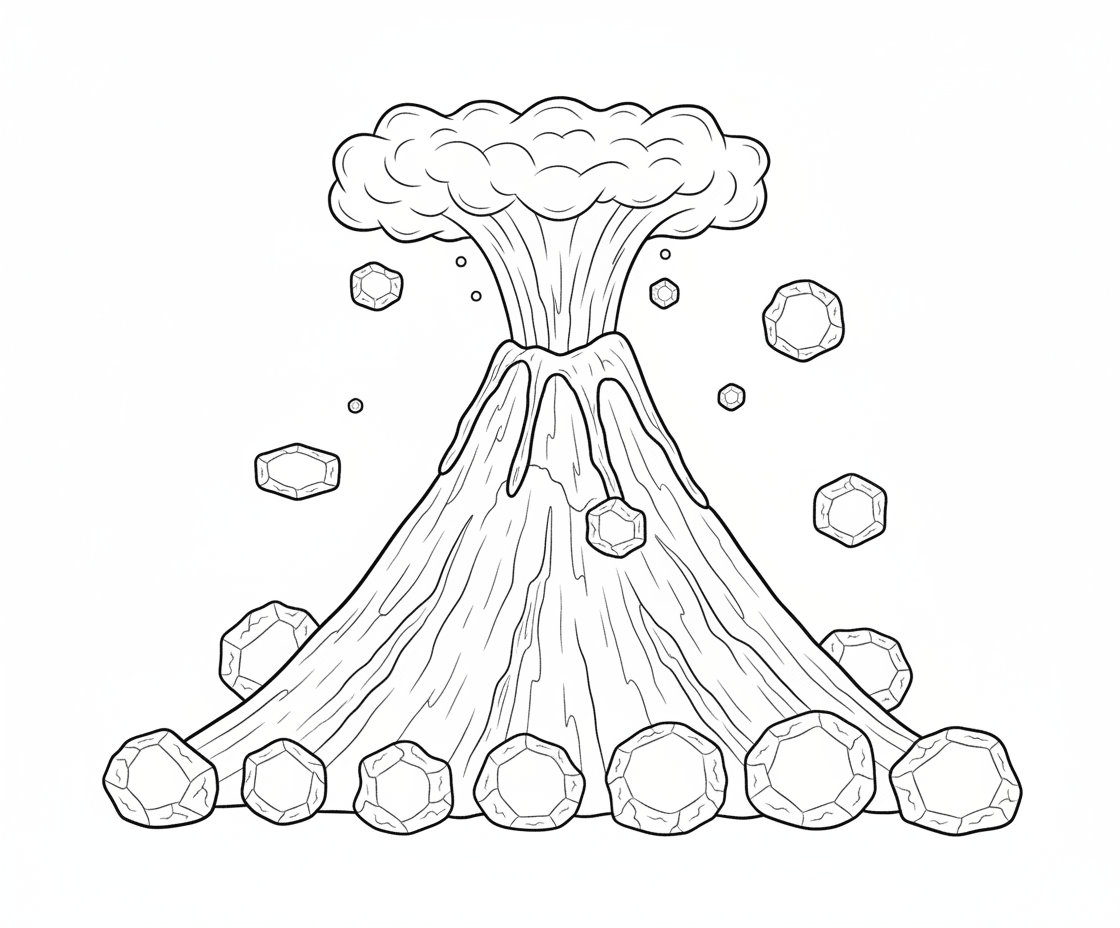
What we will do next is use AI to turn the sketch into an image that we can actually use in the worksheet. I started by giving Gemini (it’s free to get started) the sketch with the following prompt:
black and white (colouring book style) erupting volcano, rocks flying out the top and landing around, there should be whitespace inside the rocks as there will be space for numbers.

Under the volcano image there is a row of rocks next to each other in a line.

Use the sketch as a guideline, but draw with details. Rocks, should look like boulders, not geometric shapes.
The result wasn’t quite what I was hoping though.
A few more tries proved that Gemini was really stuck on drawing these gem-like boulders. Never mind though, there’s another tool we can try that’s actually especially good for imagery: Midjourney.
Midjourney, especially if you’re going to generate a lot of images, isn’t completely free, but again if it is just for your personal use, you don’t even have to generate images. There is the explore page where you can search for what other users created. It can serve both as a good repository of images and inspiration for how to prompt for specific styles. Be mindful though that to use your generations commercially you do have to have a paid account.
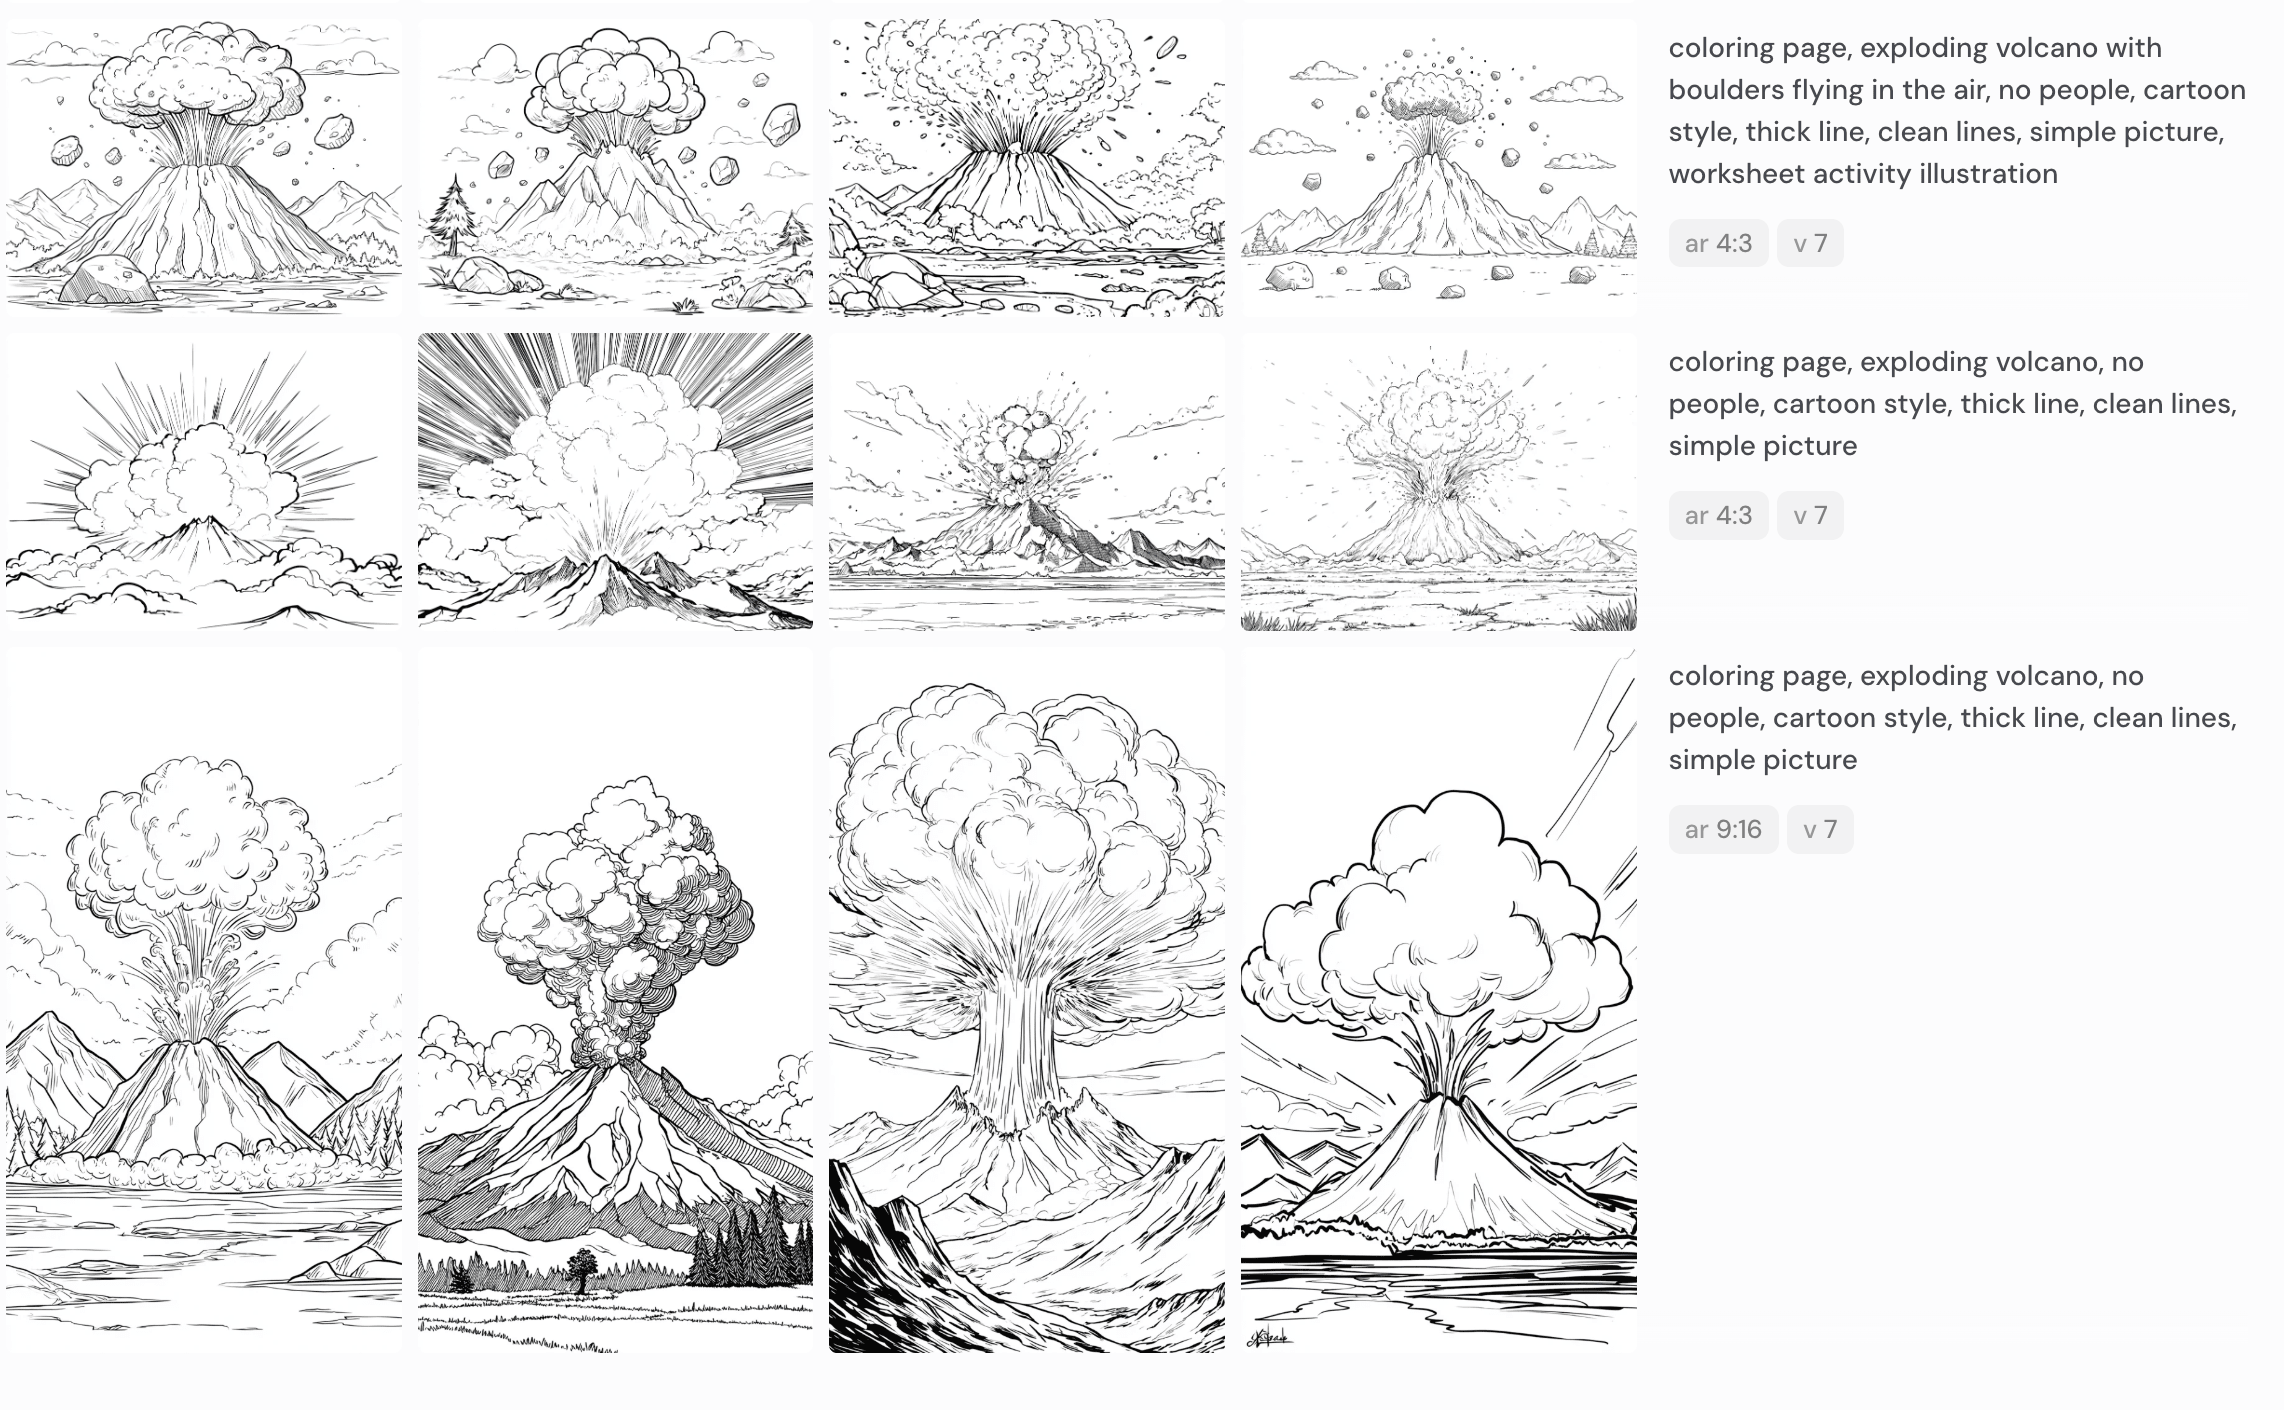
For the colouring artwork I tend to not over complicate the prompt and only sketch out the style along a simple concept description. It can take a few runs to get something that works as you can see above. The top right image was closest to what I had in mind — simple, with not too much clutter (I still needed to add numbers and instructions), and isolated boulders.
From here I could have gone straight into Photoshop. But I thought I would save myself some time and go back to Gemini for a few quick tweaks.
make all the boulders larger, the bottom boulder line should have 8 boulders
make the flying boulders twice their current size
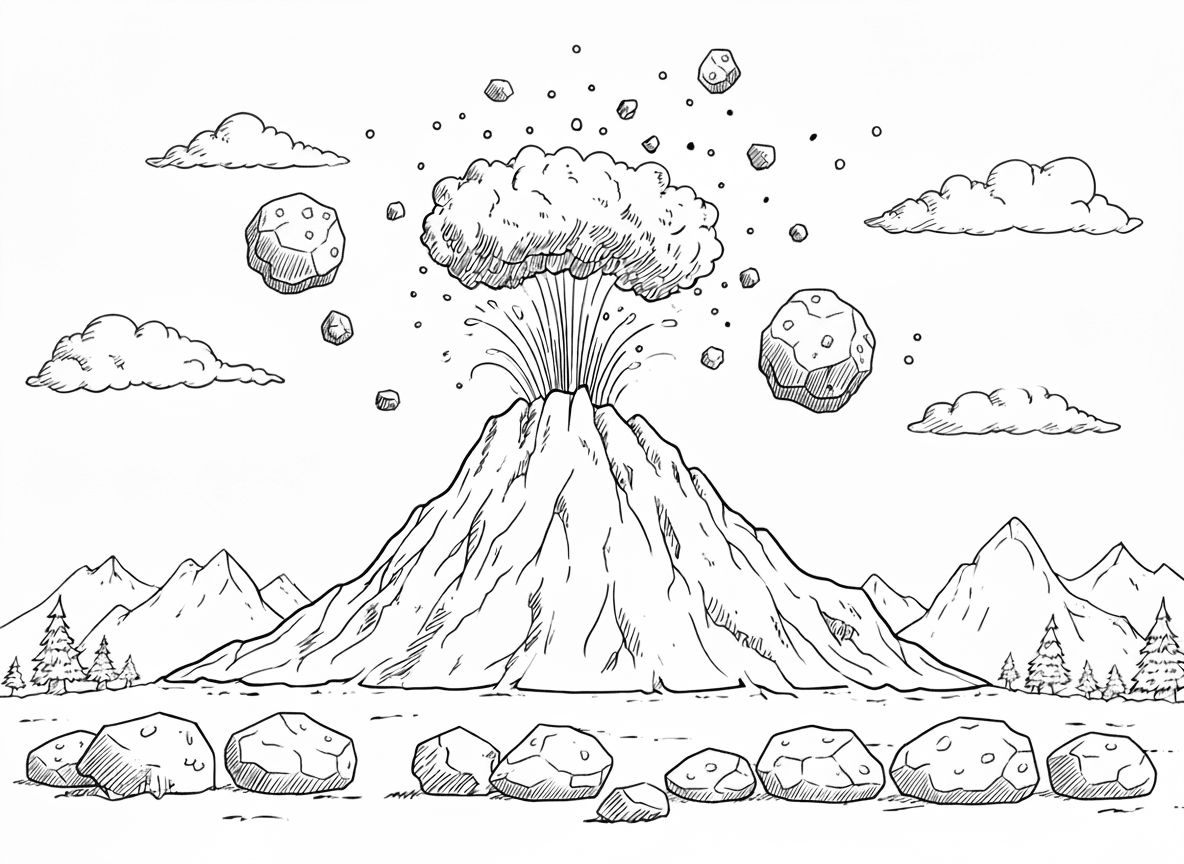
Clearly the AI is still not great at counting, but I was going to do further edits anyway, and it had gotten me 90% there.
One note here, you can do this directly in Gemini (at the time of writing it is the better of AIs at editing images) or you can opt for a more advanced option of using Google’s AI Studio. The latter is a bit more complex, but comes with a generous free token quota, access to certain features early, and the ability to edit and remove individual messages from a conversation.
With the image ready, it was time to put it all together into a proper worksheet.
How to Assemble the Final Worksheet
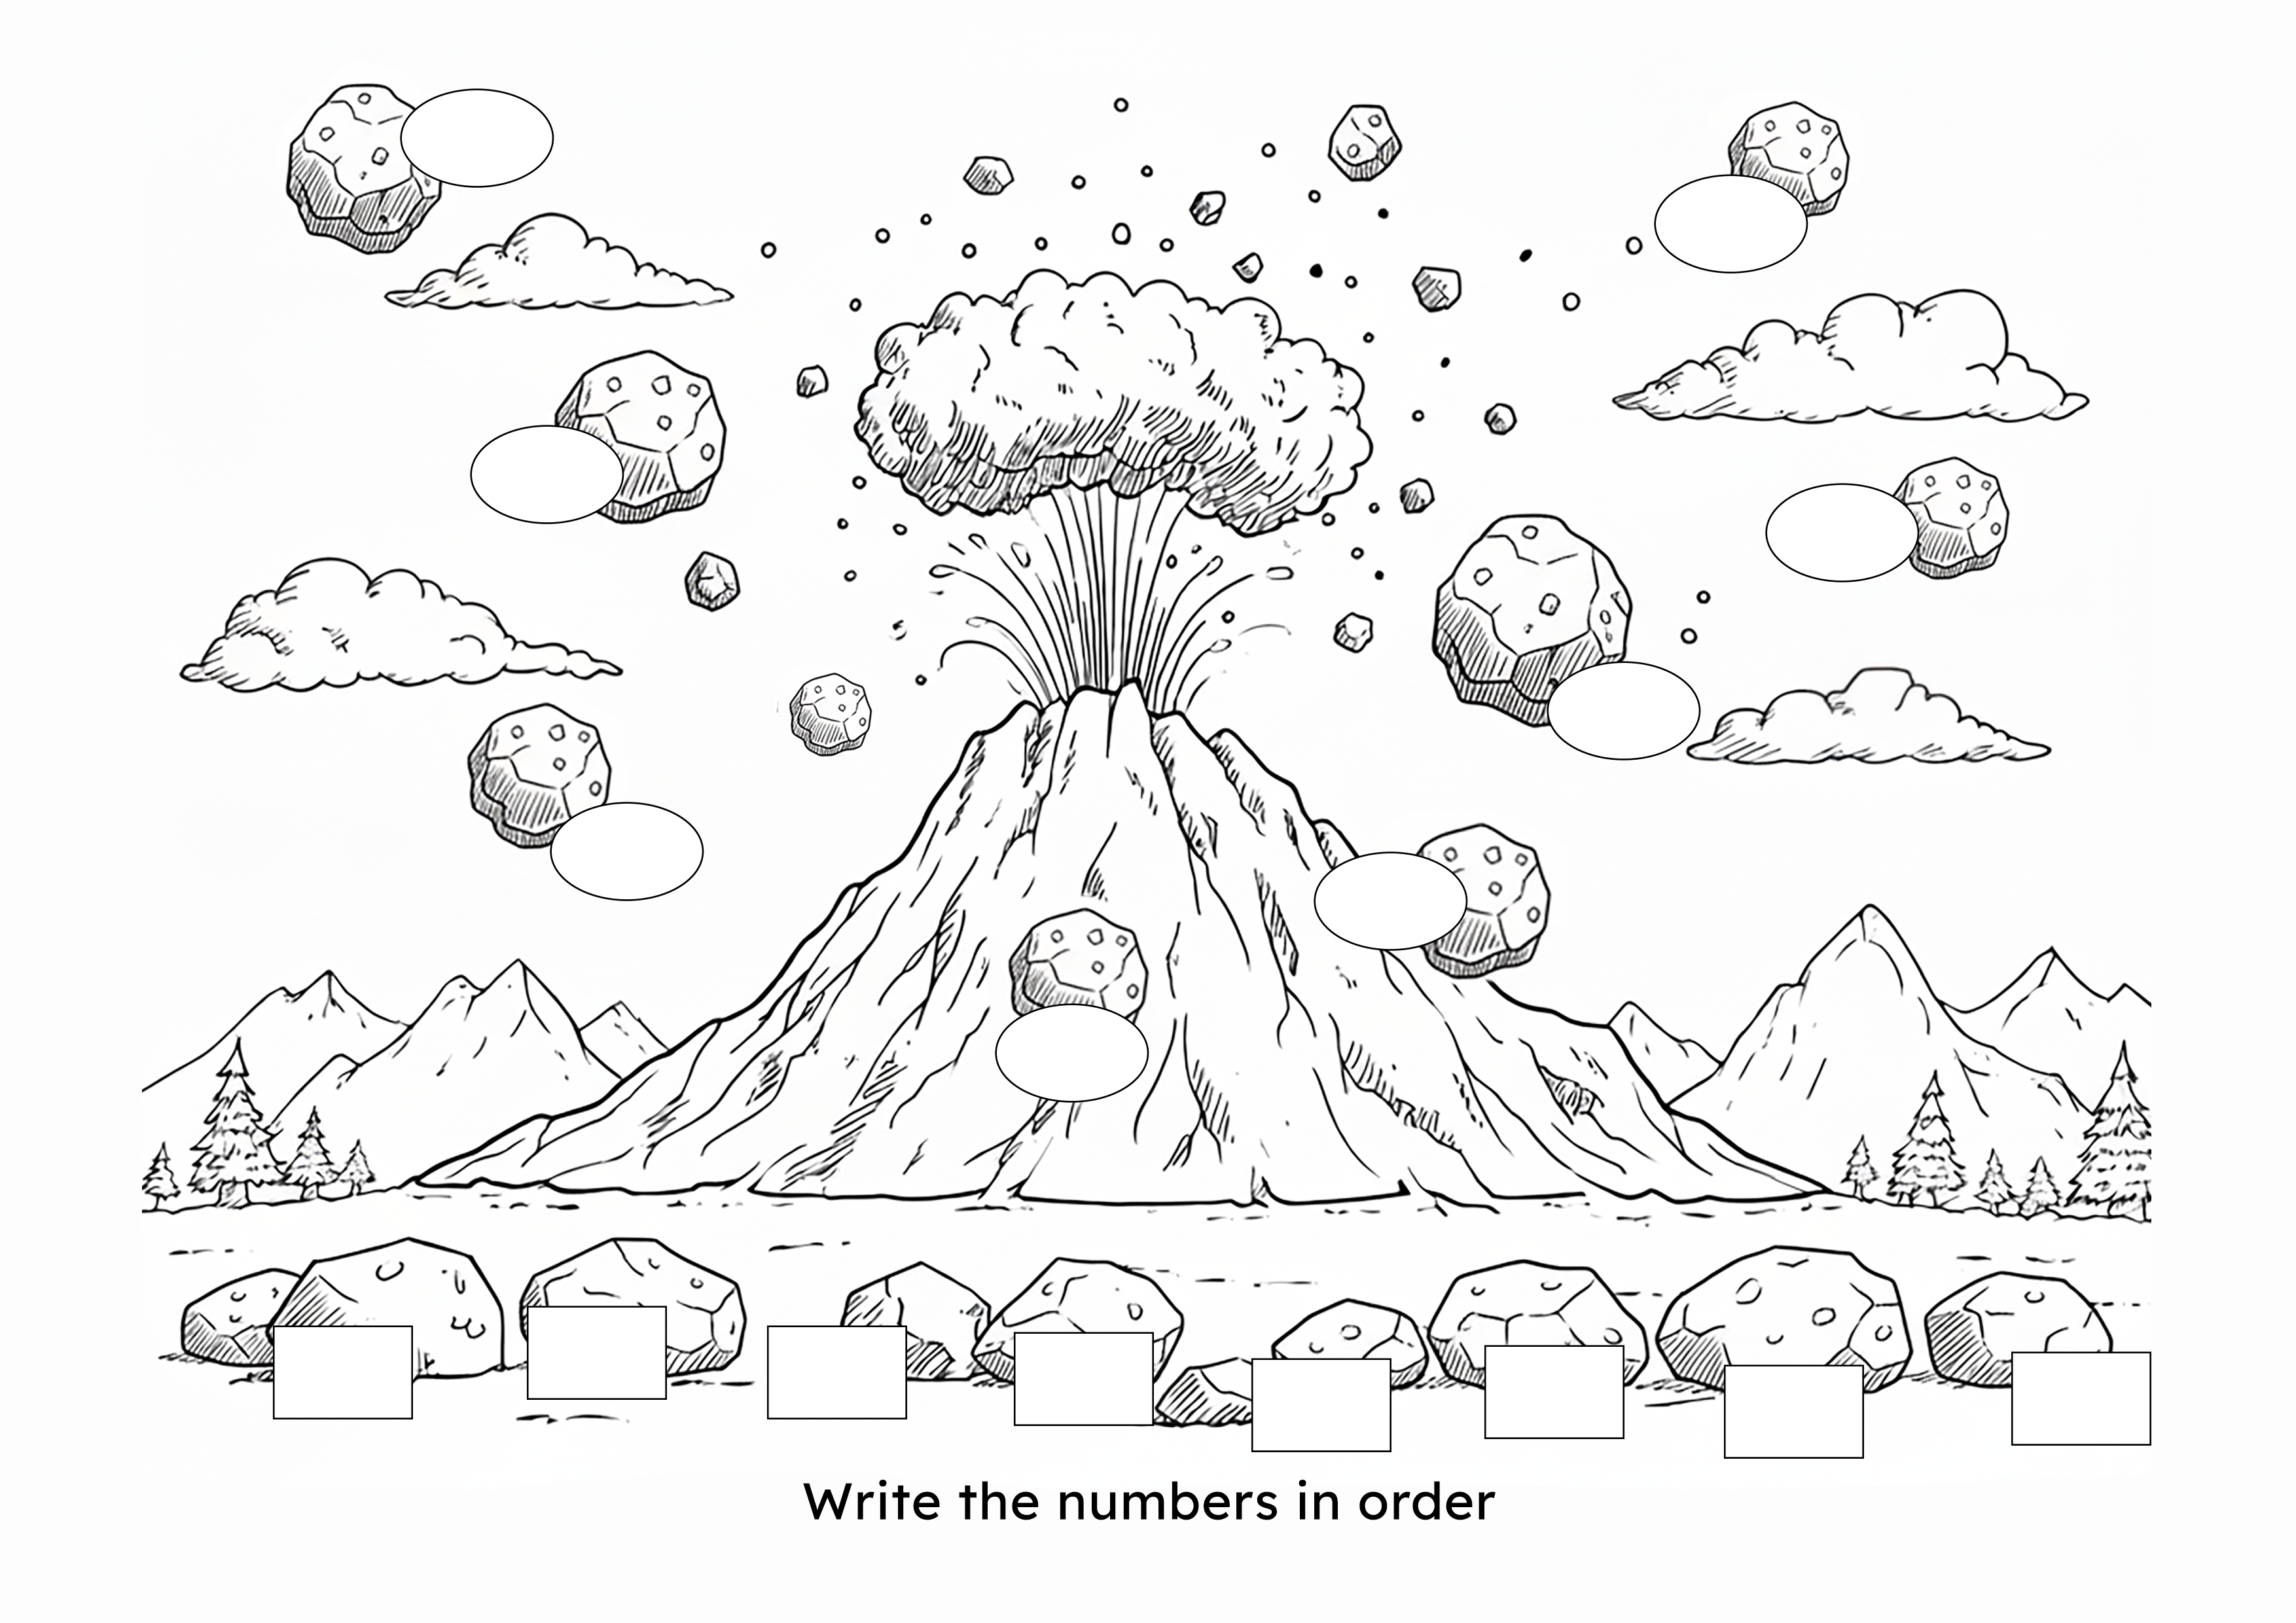
For the final activity I’ve done the following updates in Photoshop:
- duplicated some of the flying boulders to create more number spaces
- added labels for numbers and answers
- added the instruction text
- created empty number fields for reusability
I left the fields intentionally empty so that I could reuse the activity multiple times with different numbers.
This same process works for any subject or age group. Whether your kid wants “dinosaurs doing spelling” or “robots solving fractions,” the steps are the same: capture their idea, find the right images, and assemble it into something they’ll actually want to complete.
Ready to try it? Start with your child’s next random suggestion and see where it takes you.
❤️ Hope this helps!